Lesson 1: Objects and materials
Grouping objects based on the materials they are made from and recognising that objects are made from materials that suit their uses.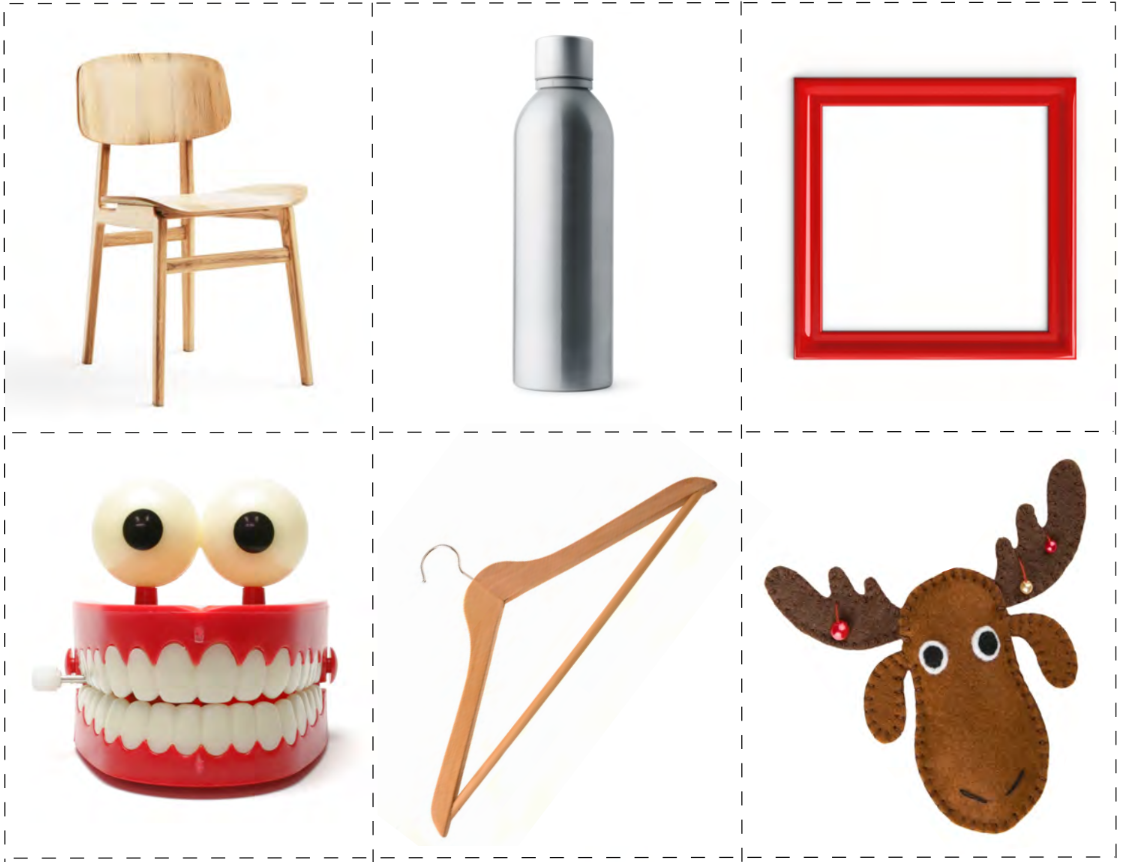
Learning objectives
Knowledge
-
To recognise that objects are made from materials that suit their uses.
Working scientifically
-
To recognise that objects can be grouped.
Success criteria
Knowledge
-
I can name objects with the same use that are made from different materials.
-
I can name a material that is used to make objects with different uses.
Working scientifically
-
I can sort objects based on properties.
Before the lesson
Check all images, videos, links and presentation slides are suitable for your class.
- Quiz: Everyday materials.
- Presentation: Objects and materials.
A selection of everyday objects (approximately 18 - see Teacher knowledge).
Sticky notes/paper strips (11 per pair).
- Equipment for the teacher demonstration (see Main event):
2 PE hoops;
2 pre-written labels (wood and plastic);
2 pre-written labels (toys and plates).
Scissors (one each).
Whiteboard pens (optional - one between two).
'The Smartest Giant in Town' story by Julia Donaldson.
When referring to tableware, such as plates and bowls, familiarise the children with the term ‘ceramics’. Ceramic is made by shaping clay and firing it at high temperatures, causing it to harden.
Lesson organisation
Prepare approximately 18 everyday objects (three per table, randomly placed) made from wood, metal, glass, plastic and fabric. Where possible, try to include at least three ‘sets’ of objects which have the same use but are made from different materials.
Suitable objects will be available at home and in school and may include the following:
Water bottle (glass, plastic and metal).
Chopping board (glass, plastic and metal).
Plate (glass, plastic and ceramic).
Pen (wood, metal and plastic).
Plant pot (ceramic, plastic and metal).
Shopping bag (fabric, plastic and paper).
Alternatively, ask the class to bring in objects from home.
Lesson plan
Display the Quiz: Everyday materials and ask the pupils to raise one, two or three fingers to indicate their answers.
Watch the Pupil video: Properties of materials to recap properties from Science, Year 1: Everyday materials.
Prepare the tables with a selection of everyday objects (see Teacher knowledge). Tell three pupils to find and fetch an object each from the tables.
For example, “Find and fetch a plate.”
When the children return to the front of the class with the objects, ask:
- What is the same about the objects? (They are all plates.)
- What is different about the objects? (Each plate is made from a different material: glass, plastic and ceramic.)
Repeat the ‘find and fetch’ game with different volunteers and objects.
Choose some pupils to collect all the objects and place them in a pile near the teacher, ready for the next activity.
Ask the class to sit in a circle and place two PE hoops labelled 'wood' and 'plastic' in the middle. Hold up one wooden or plastic object at a time and ask the pupils to call out wood or plastic to indicate which group they belong to. Once sorted, help the children recognise that several objects are made from each material, indicating that wood and plastic are suitable for a range of uses.
Ask:
- What properties does wood have that make it suitable for pegs, pencils, toys, tables and chairs? (It is strong and stiff.)
- What properties does plastic have that make it suitable for a ruler, a glue stick or a toy? (It is light and colourful.)
Re-label the hoops with 'toys' and 'plates' and ask two volunteers to select objects from the pile that belong in each group. Help the children recognise that there is sometimes more than one suitable material for an object.
Refer to the Resource: Super Science skills poster and tell the children that they are using the skill 'grouping'.
Exploring criteria
Arrange the children in pairs. Hand out scissors and the Activity: Sorting cards (one between two), instructing them to cut out the images. The children choose some of the images and sort them into two groups according to the criteria of their choice. They may not need to use all the images while sorting.
The pupils may choose to sort the images according to:
- The colour of the objects: for example, colourful objects in one group and plain objects in another.
- How the objects feel: for example, soft objects in one group and hard objects in another.
- The material objects are made from: for example, objects made from wood in one group and glass in another.
- What the objects are: for example, coat hangers in one group and toys in another.
Allow the pupils to experiment with different criteria, reassuring them that there are no correct answers. Take feedback and ask them to explain to the class how they sorted their images.
Sorting objects
Hand out the sticky notes (11 per pair) and ask them to sort their images according to what the objects are, using the sticky notes to label each group (for example, coat hangers, Christmas decorations, picture frames, water bottles, chairs and toys).
Alternatively, pupils could use whiteboard pens to write labels on their desks.
Ask:
- What materials are the different objects made from and why? (For example, chairs are made from wood, metal or plastic because a chair needs a strong, stiff and tough material.)
Sorting materials
Ask the pairs to sort their images according to the materials the objects are made from, using the sticky notes to label each material (plastic, wood, metal, fabric and glass).
- Which material is popular? (Plastic is a popular material because it is very strong and long-lasting; it can be made into any shape or colour; it can be made to be stiff or flexible.)
- Which material is the least popular and why? (Glass is not a popular material because the properties of glass are not suitable for most objects; it breaks easily; most objects do not need to be transparent.)
- Which material would not be suitable for a chair/toy and why? (If a chair were made of fabric, it would not be stiff enough to hold a person’s weight; if a toy were made of glass, it could be dropped and might smash.)
Independent task
Display slide 1 of the Presentation: Objects and materials and use it to model:
Choose three images that show the same objects (e.g. chairs) and stick them in their books.
Label each image with the material it is made from (metal, wood and plastic).
Write a sentence explaining that different materials may be suitable for one object (e.g. they are all chairs but they are made from different materials).
Display slide 2 and use it to model:
Choose one material (e.g. wood) and draw three objects made from wood.
Label each picture (e.g. picture frame, Christmas decoration and toy).
Write a sentence to explain how one material has properties that make it suitable for a range of objects (e.g. they are all made from wood but are used for different things).
Display slide 3, encouraging children to use the word banks and sentence stems.
Optional: provide each child with the Knowledge organiser for extra support.
Read the story ‘The Smartest Giant in Town’ by Julia Donaldson, then flick back through the pictures and ask:
- What objects did George give away? (A sock, shoe, tie, shirt and belt.)
- What materials are the objects made from? (The tie was made from silk; the shirt and sock were made from cotton; the belt and shoe were made from leather.)
Full-screen slides, ready for your classroom, chosen by you.
Knowledge
-
To recognise that objects are made from materials that suit their uses.
Working scientifically
-
To recognise that objects can be grouped.
We value your feedback
We welcome your feedback to help make our resources even better